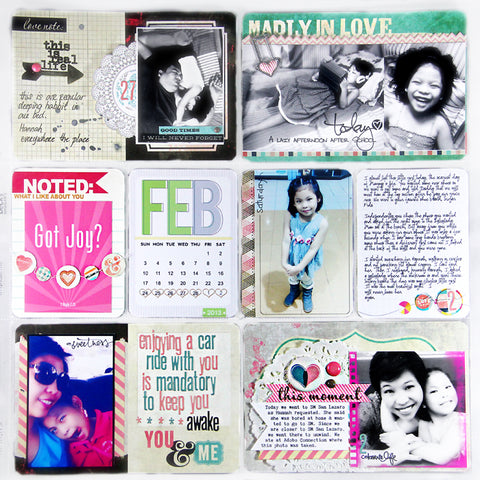
Hi everyone! I just want you to all know that I am still alive. I would like to share with you a PL page made with the After the Storm kit.
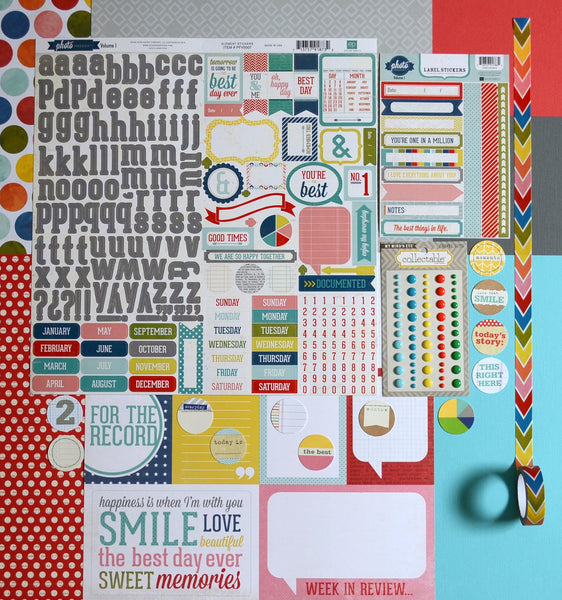
While waiting for my A Day in the Life kit by Scraptastic Club, I used my After the Storm
kit to create a Project Life page. I saved one patterned paper in
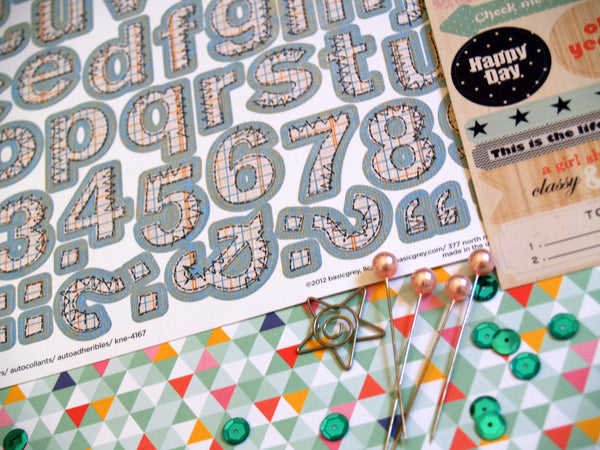
particular from the add-on, Jillibean Soup Chilled Cucumber Bitesized
Bits. This type of design is always perfect for this project.
Of course, I personalized all the journaling cards using stamps add-on,
washi tapes, scraps, stickers, diecuts, and a few items from my stash.
It was fun to doing this but quite time consuming so I am excited with
Scraptastic Club's A Day in the Life kit.
July 17, 2013
July 10, 2013
It Started With A Sketch
Hi everyone! LG here with a layout that I did using the Awake My Soul kit and add-ons from the April kit by Scraptastic Club.
Usually when making a layout I follow my
guts and without too much thinking, I just layer everything up and glue
it together. That is the easy to way to do it but sometimes, if I my
mojo is hiding, I try to begin with a sketch. I mainly do my sketches on
a piece of paper or if I have more time, I do it in Photoshop.
For my layout, I started with a sketch
that I made in Photoshop using basic shapes to create my design. Here is
the sketch that I made:
I initially thought of using several
photos for my page but end up with a single photo layout. This is the
great thing about sketches, there are many ways to interpret the
elements on it. It can also be rotated based on your liking.
Here is my take to my sketch:
As you can see, I have flipped the sketch and made the doily images
represent the circles in a bigger way. I have several rectangular
elements and had so much fun with the layering. So next time Mr. Mojo is
missing, motivate yourself to still create a page by starting with a
sketch you can see online or better, create one yourself.
July 5, 2013
Scraptastic April Kit: Happiness Together
Inspired by the diecuts, I cut a big phrase using my Cameo that I
downloaded from the Silhouette Online Store. I occupied 80% of my
cardstock to use it as my background. It was tedious adhering the diecut
to the patterned paper because of all the detailed area. With patience
and concentration, I finally made it.
To make the background subtle, I used gesso to make the phrase a bit
translucent. I wanted the photos and the embellishments to pop so I had
to do it. I also cut the word "together" and adhered it on top of the
word happiness and the photo.
To make everything complete, I cluttered
some embellishments on the left side of the photo. I have used my rubon
stash beneath the yummy embellishments that came with the kit.
Thanks for dropping by!
July 2, 2013
Scraptastic Club July Kit Reveal
Before I get to the full reveals (Which
will be available for purchase at 10 am EST) I wanted to share something
new at Scraptastic Club with you. You can now purchase the Cut Files
from all of the current and past kits.....how exciting is that? The
files come in PNG and SVG format and will be emailed to you once your
order has been processed. You can find
the cut files here:
We also have 2 new faces joining our fabulous Design Team
First up is the very talented Lisa Wilkinson....you can find her here:
And next up is the very talented Patricia Roebuck.....you can find her here:
One last thing before we get to those
gorgeous July kits, don't forget to leave a comment on this blog post
with your guesses as to who sings the song titles of our 2 main
scrapbook kits for July:
Out on the Town
Rock Lobster
You have until Sunday July 7th to play
along. One lucky person will be chosen by Random.org to receive a $10 GC
to spend in the store!
So, who's ready to see those July kits? I know that I'm ready to share them with you....
July 2013 This Life Noted PL Kit

July 2013 Out On The Town Kit
July 2013 Out On The Town Add-On
July 2013 Exclusive Scraptastic Club Out On The Town Stamp Set

July 2013 Exclusive Ormolu Out On The Town Flair Badges

July 2013 Rock Lobster Kit

July 2013 Rock Lobster Add-On

July 2013 Exclusive Scraptastic Club Rock Lobster Stamps Set

July 2013 Exclusive Ormolu Rock Lobster Flair Badges

July 1, 2013
Using Scraps to Create a Layout
For my layout, I just layered all the
patterned paper scraps from the Scraptastic Club After the Storm Kit and add-ons to create a clustered look. With the
use of foam tapes, staples, and doilies, I was able to still create a
page that doesn't look like it was made of scraps. Placement is the key
;)
Working with limited supplies, this is
the perfect time to do a minimalist page. Add paint, mists, or any small
embellishments to cover more spaces and to get that detailed look.
Thanks for dropping by!
May 15, 2013
Art Journal Technique on a Layout
Sharing you a scrapbook page layout not an art journal page c",) using the Awake My Soul kit and add-ons from the April kit by Scraptastic Club.
I am pretty sure you have heard and seen a
couple of Art Journal pages on the internet even if you just searched
about scrapbooking. They are quite related in a way but to better
understand the difference, I will leave it to the experts.
According to About.com, Art journaling is focused on the creation of a visual journal or diary
using your artistic skills and techniques, whereas scrapbooking is
focused on the collation and presentation of memories, photos, small
keepsakes and memorabilia, using creative techniques to enhance these.
For my layout, I combined the techniques
in creating an art journal and the techniques in making a scrapbook
page. To incorporate the art journal, I have done basic techniques which
includes painting, masking, doodling, and stamping. For the scrapbook
part, I did some layering, use of photos and embellishments.
I started with an 8"x12" watercolor
paper. I decided to use this instead of an ordinary cardstock to avoid
too much warp since I am using a lot of water to blend my colors. I
started with painting the paper with a good amount of water before
adding watercolor randomly. Water helped the paint blend together. I
also sprinkled some mist on it several times then sprinkled water again
to blend everything once again. Once dried, using a Studio Calico mask, I
added texture with a modeling paste.
Final touches include stamping using the
stamps that came with the kit with brown and white ink pad and doodling
to get the art journal effect.
For the scrapbook part, I have used some
washi tapes that I received from past kits and the embellishment that
came with the kit layered together. I played with the placement of all
the items and even doodled over the alpha and some of the stamped
images. With the basic layering and use of a photo of my daughter, i was
able to turn my art journal background into a 12"x12" layout.
It was fun doing this page despite all
the mess. I am sure this will not be the last time that i will be
integrate this technique to my pages. I do hope I have inspired you to
give this a try.
Thanks for dropping by!
May 9, 2013
Awake My Sout Layout
Hi everyone! haring a layout using Scraptastic Club's April kit, Awake My Soul kit and add-on.
I just adore this kit so much. The combination of patterned papers, embellishments, and colors is perfect for everyday photos.
For my layout, I was inspired with the
phrase diecuts that came with the kit. I have a Silhouette Cameo but
getting ready made cutout is a lot more convenient. I usually take hours
just deciding on the design and the phrase that I will cut when I am in
front of my laptop. So, just imagine how happy I am to get several of
these with the kits.
Mine Forever
This layout focuses on the photo and the big phrase "Mine Forever"
diecut. I used some scraps to paste beneath the words to make it pop. I
have also used watercolor and mist to add color to my plain white
background. I used the same color from the scraps I have used to make it
coherent.
I also adore the add-on stamp
that is with this kit. I have used a gold ink pad to achieve the same
color of the kraft diecut. I am not good with stamps and wasn't able to
press it hard enough so the effect was a little bit grungy. I layered
the tags as well to add dimension to the page.
I hope I get to use my Cameo more often now after this. Thanks for dropping by!
April 28, 2013
I'm still here...
Hi everyone! Sorry i wasn't able to update my blog lately. This month has been really busy with Hannah transferring to a new school, looking for a new house, Hannah's 5th birthday, and having a new position at work.
It was a crazy month and I think it will not end very soon. With the Summer heat here in the Philippines, I have sacrificed my scrapbooking a lot to preserve my energy doing other stuff.
Anyway, I am happy to inform you that my little angel, the baby that everyone have seen on my pages as she grows up, is now a little missy. She turned 5 last April 19 and is now more talkative than ever.
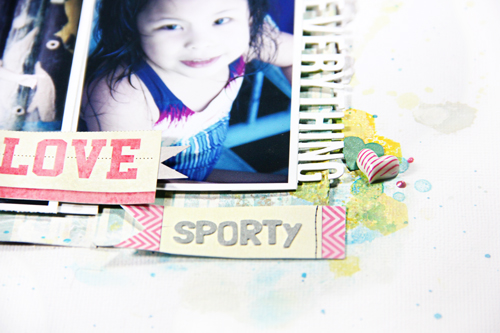
Here was a layout that I made using some photos of her from last year. I have used Scraptastic's Everything I am Kit and add-ons and some leftover from Everyday Is Like Sunday Kit. Just look at those firm muscles at her age. She is quite sporty, dont you think?
Nowadays, creating a scrapbook page doesn't only involve papers, stickers, ribbons and other traditional materials. Now, we see a lot of mixed media added to a layout to give a more personal touch- gesso, modeling paste, acrylic paint, watercolor, crayons to name a few. These gives the scrapbooker the freedom to be more creative and to have extra fun.
Here I have used watercolor. To get a more subtle effect, use more water to make the color lighter. To blend several colors, I added a second color while the first one is still wet. Try to experiment first to get your desired effect. For example, if you waited for the 1st color to dry first before adding the 2nd color, you will get a translucent effect, no blending will occur.
The paper does warp especially if you have used a lot of water. What I usually do is, after I made a layout, I adhere it over another cardstock. I cut 1/2" on the top and on the left so that once I adhere my layout, it will not peak through. I usually use cardstocks that I think I will not use anymore, mostly the colored ones. If it still wraps, just leave your page on the table and add heavy objects on top of it for a day. Items like a stapler, jars, or blocks will do. Putting thins on top of it will help your page straighten out and will solve your problems with paint.
Thanks for dropping by! I

It was a crazy month and I think it will not end very soon. With the Summer heat here in the Philippines, I have sacrificed my scrapbooking a lot to preserve my energy doing other stuff.
Anyway, I am happy to inform you that my little angel, the baby that everyone have seen on my pages as she grows up, is now a little missy. She turned 5 last April 19 and is now more talkative than ever.
Here was a layout that I made using some photos of her from last year. I have used Scraptastic's Everything I am Kit and add-ons and some leftover from Everyday Is Like Sunday Kit. Just look at those firm muscles at her age. She is quite sporty, dont you think?
Nowadays, creating a scrapbook page doesn't only involve papers, stickers, ribbons and other traditional materials. Now, we see a lot of mixed media added to a layout to give a more personal touch- gesso, modeling paste, acrylic paint, watercolor, crayons to name a few. These gives the scrapbooker the freedom to be more creative and to have extra fun.
Here I have used watercolor. To get a more subtle effect, use more water to make the color lighter. To blend several colors, I added a second color while the first one is still wet. Try to experiment first to get your desired effect. For example, if you waited for the 1st color to dry first before adding the 2nd color, you will get a translucent effect, no blending will occur.
The paper does warp especially if you have used a lot of water. What I usually do is, after I made a layout, I adhere it over another cardstock. I cut 1/2" on the top and on the left so that once I adhere my layout, it will not peak through. I usually use cardstocks that I think I will not use anymore, mostly the colored ones. If it still wraps, just leave your page on the table and add heavy objects on top of it for a day. Items like a stapler, jars, or blocks will do. Putting thins on top of it will help your page straighten out and will solve your problems with paint.
Thanks for dropping by! I
April 7, 2013
Project Life using Everything I am Kit
Hi everyone! Today, I am sharing another Project Life page that I did using the Everything I am Kit and add-ons. I am so thrilled that our kits comes with a lot of goodies that are
perfect for Project Life. This month's kit and add-ons are no exemption, it comes with some
journaling cards and tags, cute mini alpha stickers, and Ormulu Flair, doilies, some diecut, and amazing stamps.
Let me share with you a page that I did using the kit. This year, I
decided to combine digital elements available in the web and traditional
scrapbooking to add texture and dimension.

To create each panel, I usually layout everything in Photoshop so that I
can get the photo size correctly. These photos were taken using my mobile phone. I mostly do my journaling in
Photoshop as well and sometimes add my own handwritting. After printing
my photos and my journaling, I simply adhere them to the main card (6x4)
and add a few elements for the design.
I have mainly used the Glitz Design Love
You Madly Bits and Pieces patterned paper for my 6x4 cards. It is
perfect for Project Life. I also adore the assorted mini alpha stickers
that came with the kit add-on as well as the stamp set.
Here are some close-up shots of the 6x4 cards:


So next time you do your Project Life
spreads, use the Scraptastic kits. You can use the embellishments and
the small leftover patterned papers to your spread. With all the yummy
goodies in each kit and add-on, you can create several layouts, cards
and a Project life spread.

March 21, 2013
Scraptastic Club Kits April Sneaks
8 Days a Week
Awake My Soul
March 15, 2013
Everyday is Like Sunday
Hi everyone! I would like to share with you a few layouts that I did using the Everyday Is Like Sunday Kit and add-ons by Scraptastic Club.
I love kits like this, kits containing
colorful papers and embellishments. They are perfect for everyday photos
of kids, a sunny environment or even our love for scrapbooking.
2 Adorable
This month's theme is about punches. I admit, I am a hoarder when it
comes to punches before but with the release of Silhouette Cameo, my
punches hasn't been used for quite a while. Thank goodness of this
month's theme, I was able to rekindle my love for punches.
A Must Have
I particularly love this artsy hexagon
patterned paper that came with the kit (Glitz Honeycomb). It inspired me
to create a layout about my addiction to mists. Here, I have used it to
splatter some dots, used it to paint circles, as an ink to the clear
stamps, and as a spray.
I hope you enjoyed viewing my layouts using this fun kit.
Thanks for dropping by!
March 11, 2013
Colors & Fuzzy Cutting
It has been a while since I used a lot of colors in one page. I used to
love so many colors when I was just started this hobby. I am also a huge
fan of fuzzy cutting but with a limited time to craft nowadays, due to
work, I rarely do it anymore.
For this page, I challenged myself to try my "Used to be" style when I
started scrapbooking. I searched my stash and gathered supplies that has
lots of pop of colors. I also did some layering of some fuzzy cut
pieces from patterned papers.
For the butterfly, I used a lot of liquid pearl to get the embossed and shiny look. I love how the texture looked like when it got dried.
I adore the bird cages. They are
so cute especially with color. I have used the bib size and the tiny
version of this cages. Both were painted with teal acrylic, used some
crackle paint and glimmer glaze.
March 5, 2013
Scraptastic Club March Reveal!
This is the exciting part of the month...THE REVEAL!!!!!! You will definitely love both of this kits because they are tooo gorgeous!
Everything I Am Kit
A fabulous mix of mfrs! Glitz, Lily Bee,
Teresa Collins, Webster's Pages, My Mind's Eye. A great mix of
embellies. A versatile kit to be used on whatever you choose. Did you
catch more of Jessica's exclusive cuts and flairs made exclusively for
us from Ormolu? ;)
Everything I Am Add-On
More Lily Bee and Glitz. You gotta love
Navy with pink. :) It is one of my favorites. Anything with Navy is
always good!! :) For all of you Washi tape enthusiasts, more Washi. :)
Everything I Am Stamp Set
Check out the stamps to go with this kit! Fabulous!
Everything I Am Exclusive Ormolu Flairs
Mr. Brightside Kit
Still have the winter blues? Mr.
Brightside is sure to chase those away!! Such a fun, color packed kit!!
This kit contains goodies from Echo Park, Lily Bee, Glitz, Authentique
to name a few. Check out the fun embellies!! Wood veneers, flag pins,
Jessica's exclusive cuts and our exclusively made for us Flairs from
Ormolu.
Mr. Brightside Add-On
This add on continues to pack in lots of
great color and patterns. Check out the new enamel dots! and more washi
tape! All the little bits and cut apart title and journal cards are
perfect for all of you Project Life enthusiasts.
Mr. Brightside Stamp Set
Check out the stamps Jessica designed! These are just perfect for this kit!
Mr. Brightside Exclusive Ormolu Flairs
Subscribe to:
Posts (Atom)